WorshipUI guide
Install the desktop app, prepare a setlist, and run your service.
Install WorshipUI
- Open the latest GitHub release and expand Assets. Choose the installer for your computer and language needs.
- Windows: Open the downloaded
.exeand follow the installer prompts. Then launch WorshipUI from Start. - Mac: Open the
.dmg, drag WorshipUI into Applications, then open it from Applications. - Open the demo service, connect your displays, and try sending a test slide live before your first service.
The 0.3.8 release offers Windows English/Spanish, Windows English-only, and Mac English/Spanish installers. GitHub’s release page also includes the publisher’s installation notes for the unsigned builds.
Build and organize a setlist
The workspace keeps the order of service, slide thumbnails, preview, and live output in view.
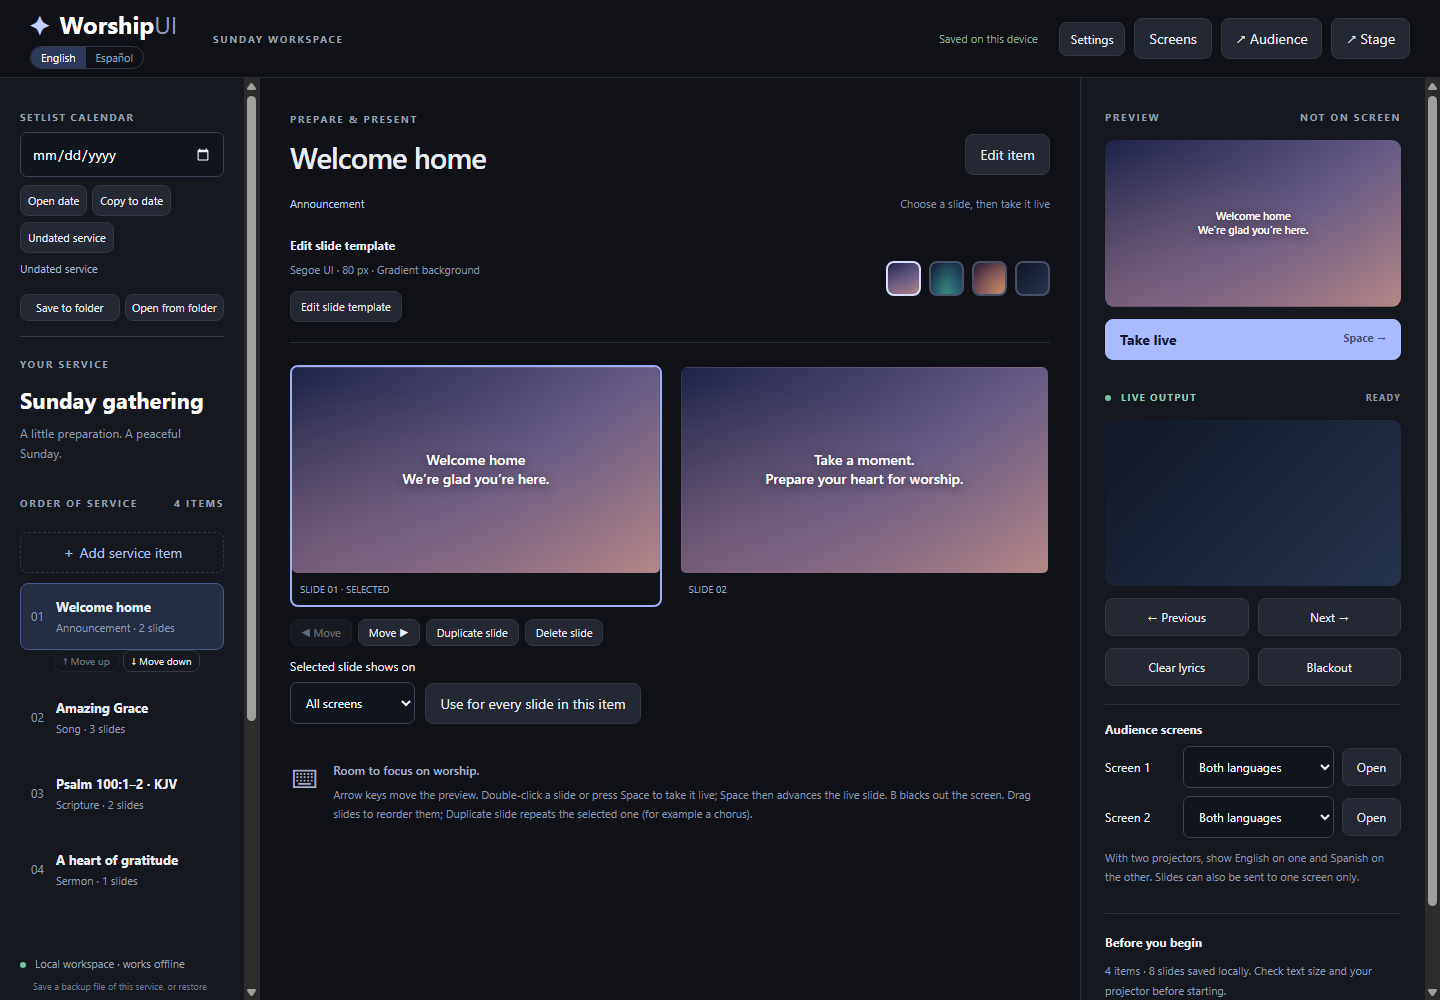
- Choose a date in the setlist calendar, then choose Open date. Use Copy to date to reuse a service.
- Choose Add service item and select the item type. Move items up or down in the order of service.
- Select a slide and drag it to reorder, or use the move buttons. Use Duplicate slide to repeat a chorus.
Add songs, Scripture, and other content
Use the item editor for lyrics, readings, sermon points, announcements, media, and countdowns.
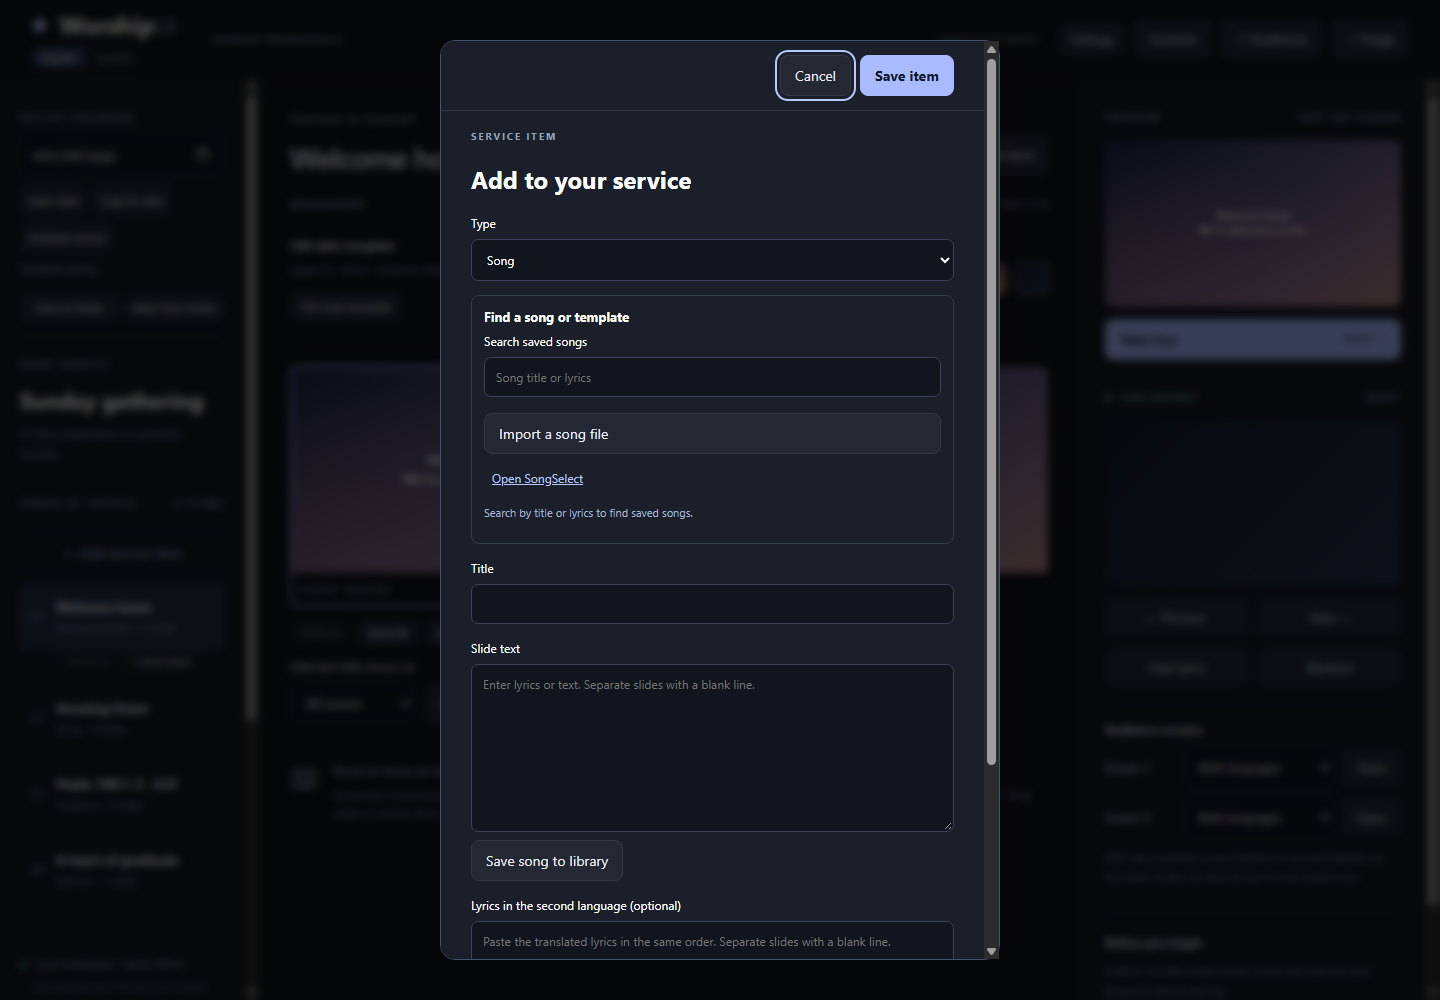
- For a song, search the library, import a licensed SongSelect text file, or paste lyrics with a blank line between slides. Choose Save song to library to reuse it.
- For Scripture, select a version and passage, preview the result, and choose Add selected passage. Choose one verse per slide or show the passage together. Use Settings → Licensed Bible versions to import text you have permission to use.
- Choose Announcement or Sermon for text slides, or use Add images or videos for local media. On Windows with PowerPoint installed, use Import PowerPoint to bring in slide images.
- For a countdown, choose a duration or end time and decide what should happen at zero.
Translate lyrics and assign languages
The bilingual edition translates lyrics locally and controls what each audience screen shows.
- Edit a song, then choose Translate the lyrics. Review the result for meaning and singability before saving.
- For a manual translation, match each translated block to the corresponding main-language slide. In Screens, choose first language, second language, or both for each output.
Style the slides
Templates set the appearance for every slide in the selected item.
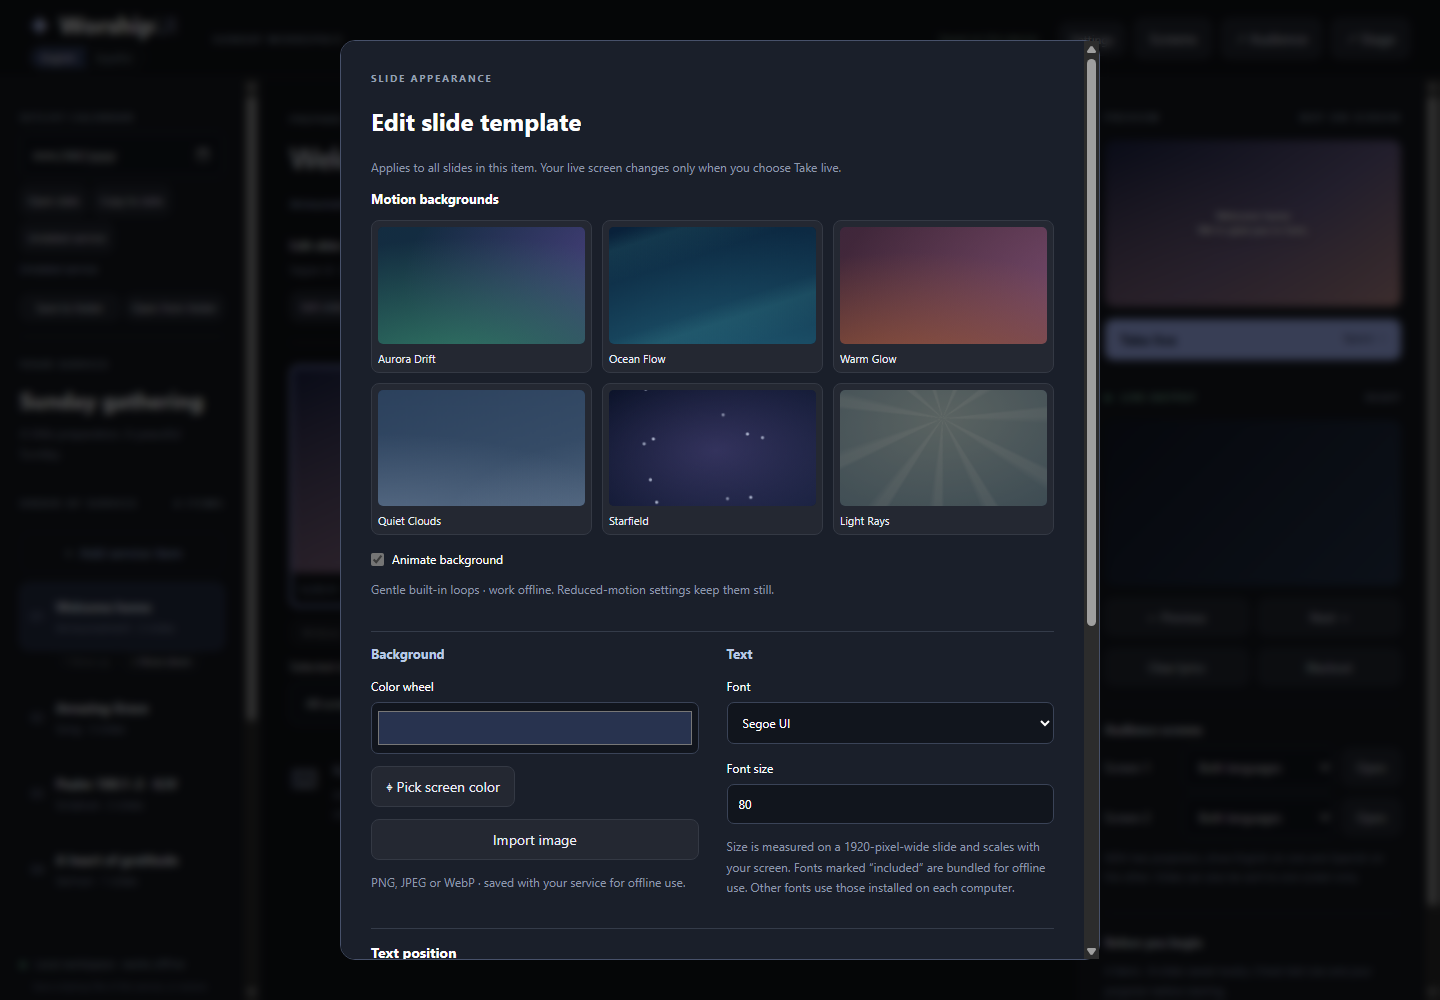
- Select an item and choose Edit slide template. Set the font, size, and text position.
- Choose a gradient or motion preset, or import a background image. Turn off Animate background for a still image.
- Review the preview, then choose Take live when you’re ready to show it.
Set up audience, stage, and livestream
Audience screens show the presentation. The Stage screen shows the current and next slide.
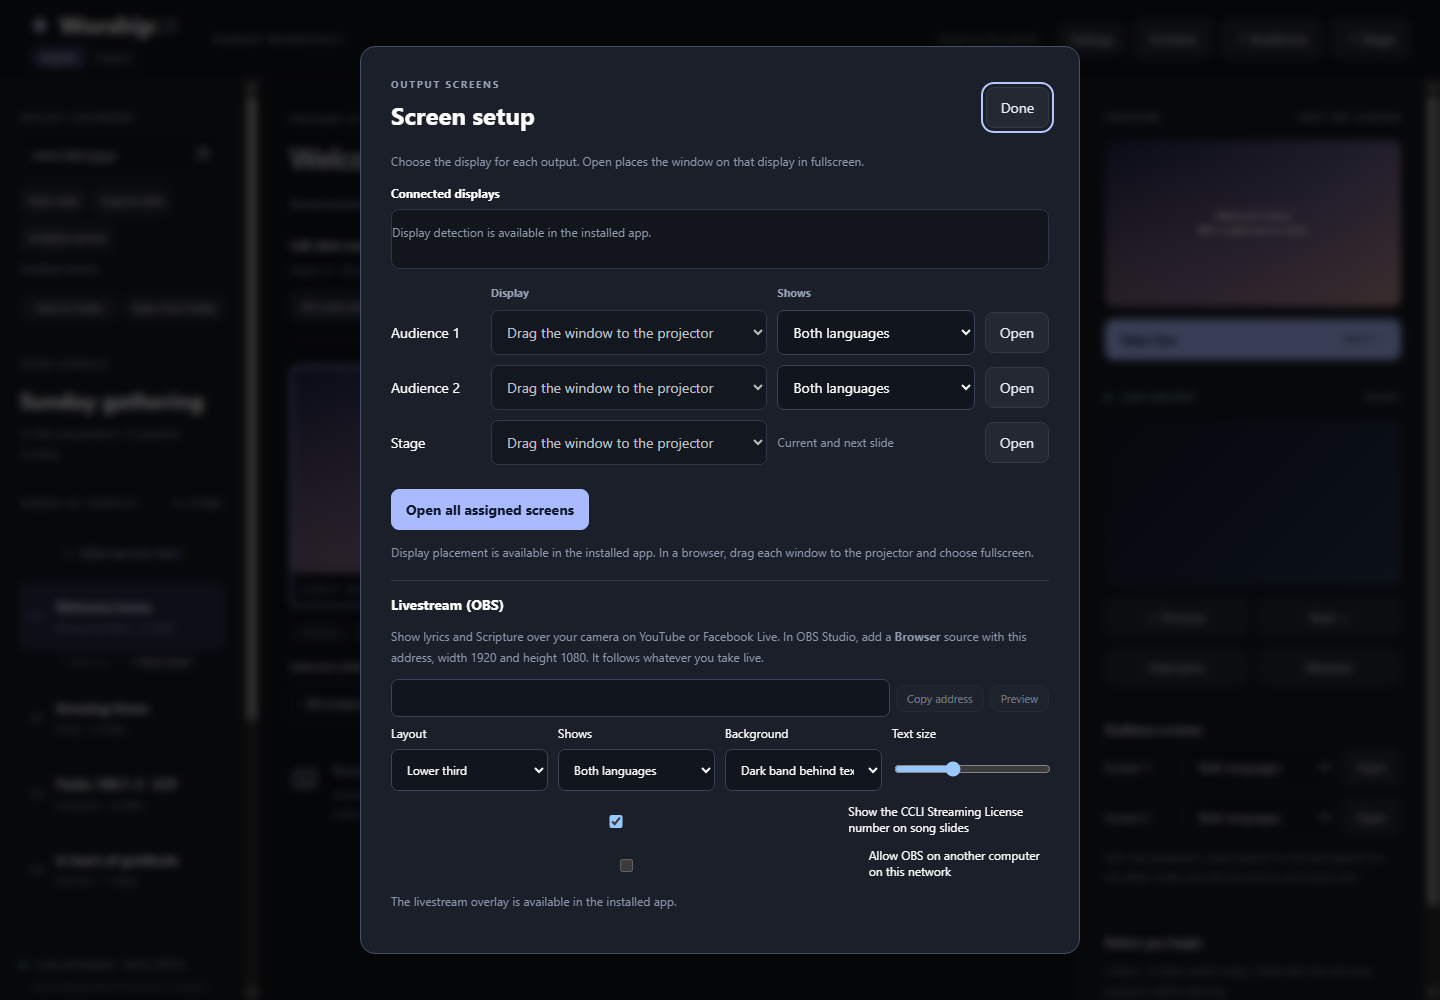
- Connect the displays, choose Screens, and use Identify displays in the installed app. Assign Audience 1, Audience 2, and Stage, then open the assigned outputs.
- Choose where a slide appears under Selected slide shows on. Apply it to every slide in the item when needed.
- For streaming, open Screens → Livestream (OBS), copy the overlay address, and add it in OBS as a 1920 × 1080 Browser source. Choose a lower-third or full-screen layout and bring a test slide live.
Run the service
Preview changes before they go to the room.
- Use the arrow keys to change the preview. Double-click a slide or press Space to take it live. Press Space again to advance.
- Use Clear lyrics to remove the words while keeping the background. Press B or choose Blackout to hide the presentation.
Set up branding and share setlists
Use Settings to configure church branding, language defaults, and your shared setlist folder.
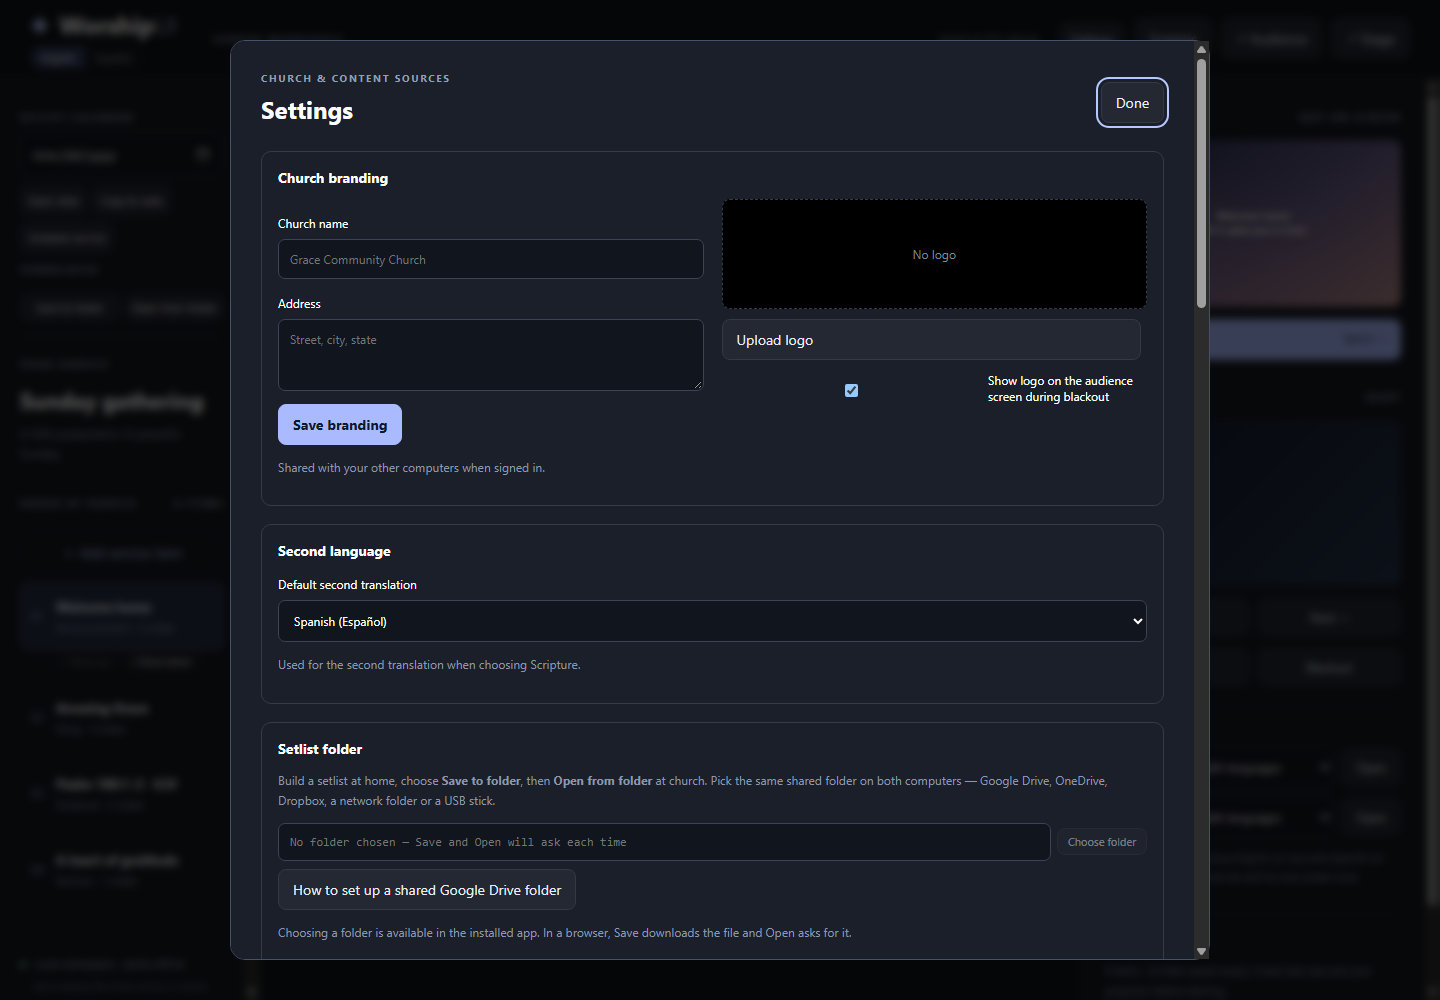
- Enter your church name and upload a logo under Settings → Church branding. Choose whether the logo appears during blackout.
- Choose the same shared folder on both computers. At home, use Save to folder. At church, use Open from folder. Use a shared drive, synced folder, or USB drive.
- Use Back up to export a separate copy and Restore backup to load it. Rehearse offline on the presentation computer before the service.
Receive requests by email
A dedicated church inbox can collect setlists and Scripture requests.
- In the installed app, open Settings → Inbox and connect a dedicated email account. Gmail requires a Google app password.
- Use Setlist or Songs in the subject and send one song per line. Use Scripture or Reading for a Bible reference and optionally include the verse text.
- Open Inbox, review the email, then select the songs or reading to add. Add lyrics for songs that aren’t already in your library.